
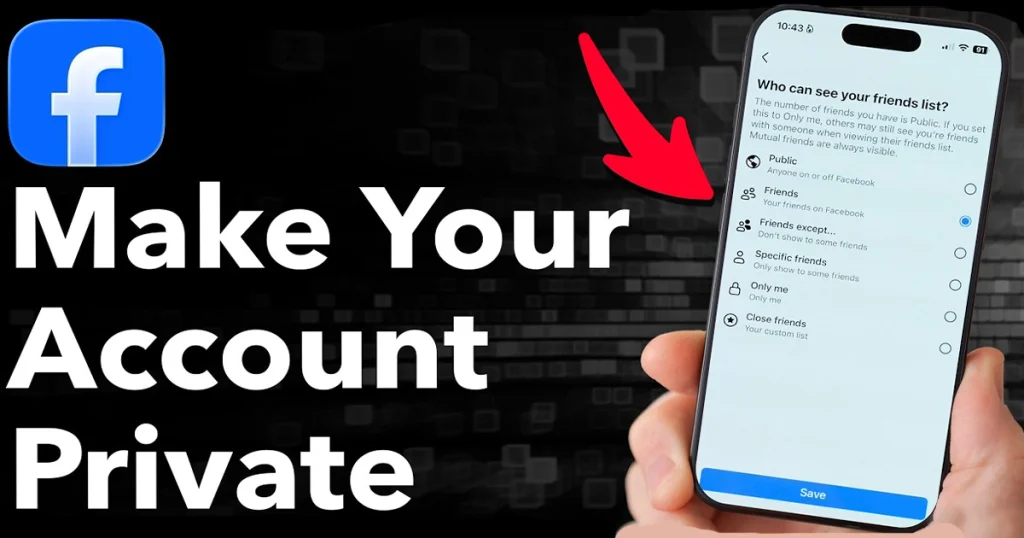
 If you use Facebook regularly, you may not want everyone to see your posts, profile information, friends list, or older content. Fortunately, Facebook provides several privacy settings that let you control who can see your information.
There is no single “Make My Facebook Account Private” button on desktop. Instead, you need to review several privacy settings and change their audiences. The easiest place to start is Facebook’s Privacy Checkup, which walks you through important privacy controls.
In this guide, you’ll learn how to make your Facebook account private on desktop, including how to control future posts, limit past posts, review tags, and manage blocking settings.
Important: Facebook can show slightly different options depending on your account or region. Also, not every setting needs to be changed to Only Me. Choose the most private audience you actually want for each setting.
How to Make Your Facebook Account Private
Step 1: Open Facebook and go to Settings & Privacy
Open Facebook on your desktop and log in to your account.
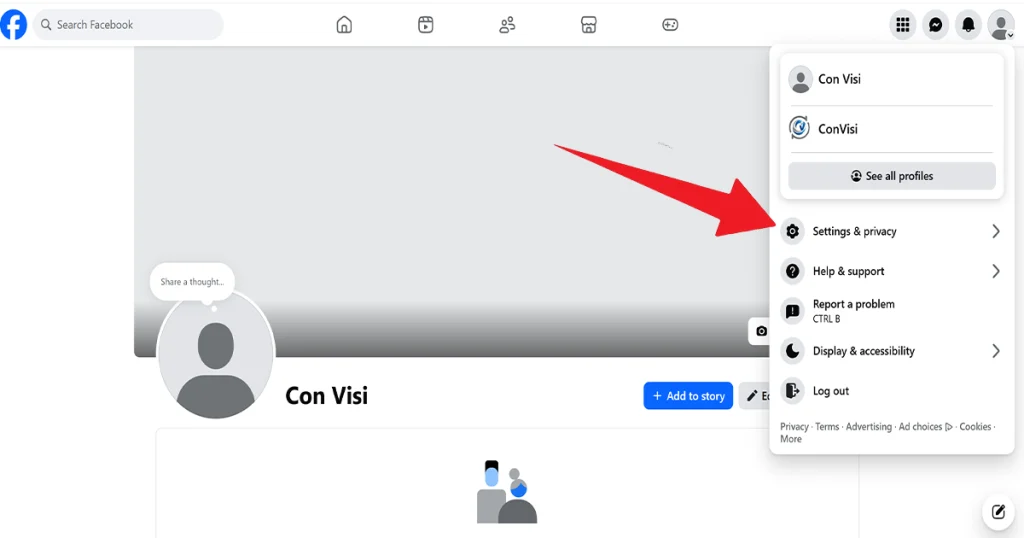
- Click your profile picture in the top-right corner.
- From the menu that appears, click Settings & privacy.
Step 2: Open Privacy Checkup
After opening Settings & privacy, you will see several options.
- Click Privacy Checkup.
- Facebook will open the Privacy Checkup page.
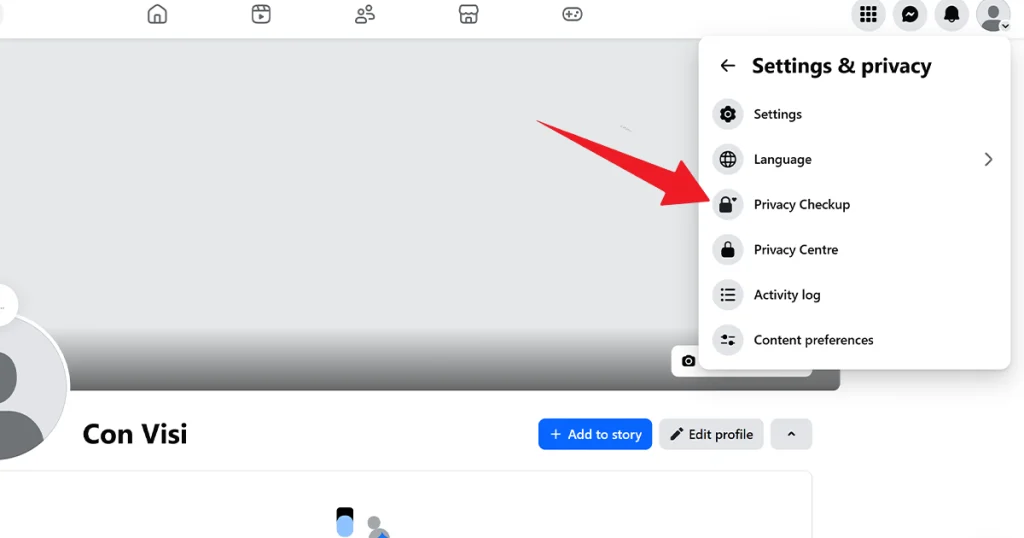
This tool lets you review several privacy settings for your account in one place.
Step 3: Select “Who can see what you share?”
On the Privacy Checkup page, you will see different sections.
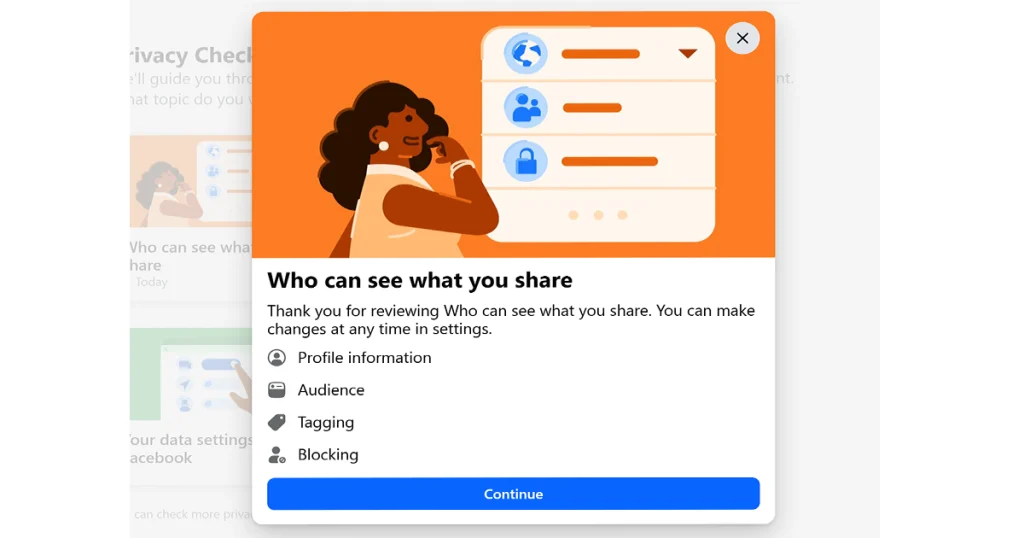
Click Who can see what you share?
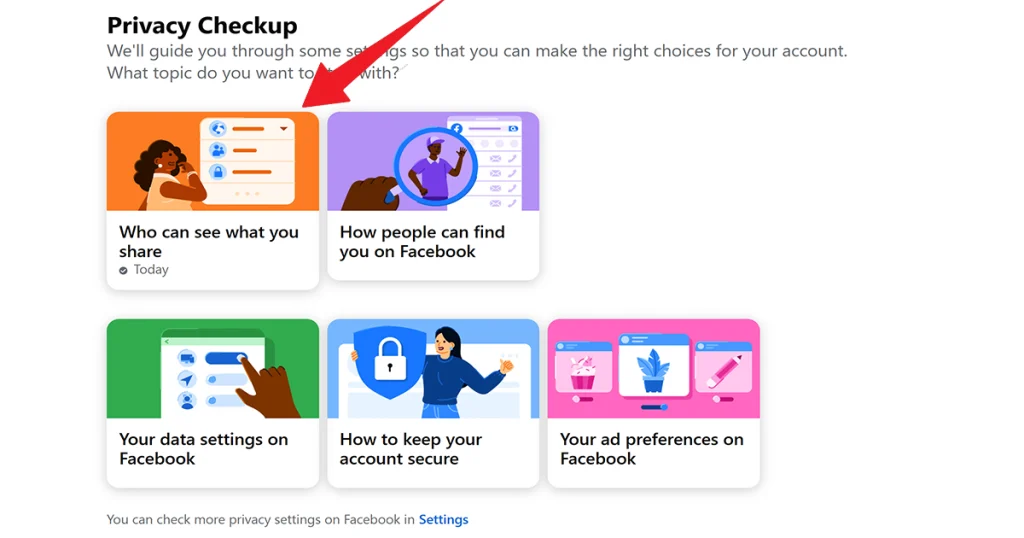
This section lets you review who can see information and content you share on Facebook.
Step 4: Review your profile and post privacy
Facebook will now take you through your privacy settings.
Click Continue to start the review.
Go through the available settings and change the audience based on how private you want your account to be. For information you want to keep completely private, select Only Me where that option is available.
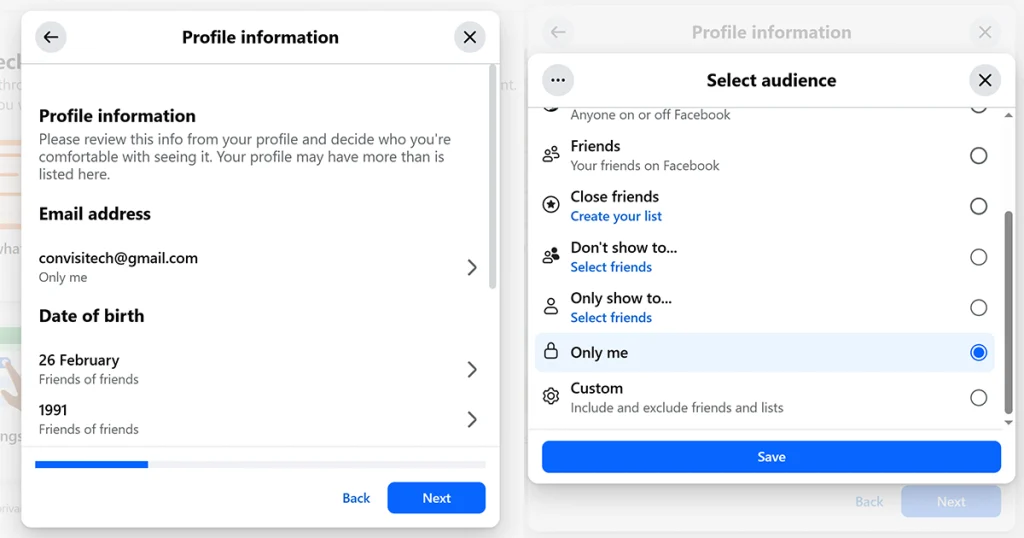
For example, if you do not want other people to see a particular piece of personal information, set its audience to Only Me.
Step 5: Review the remaining sharing settings
Continue through the Privacy Checkup and review the available options.
For settings that are currently Public, change them to a more private audience if you do not want everyone to see them.
If an option gives you Only Me, you can select it when you want that information to be visible only to you.
Tip: Don’t automatically select Only Me for every setting. For example, you may still want your friends to see your posts.
Step 6: Limit your past posts
When Facebook takes you to the audience settings, look for Limit Past Posts.
Click Limit Past Posts if you want to change the audience of older posts that were previously shared with a wider audience.
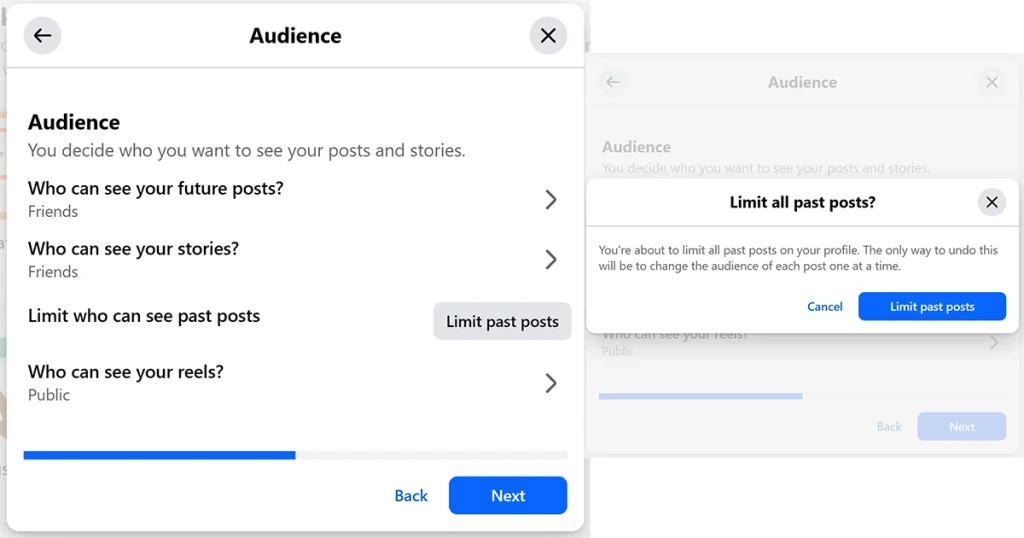
This is an important step if you have been using Facebook for a long time and some of your older posts were public.
For example, if an old post was shared with Public, limiting past posts can change the audience of those older posts to Friends.
Step 7: Review blocking settings
Continue through the Privacy Checkup until you reach the Blocking section.
Here, you can review people you have blocked and manage your blocking settings.
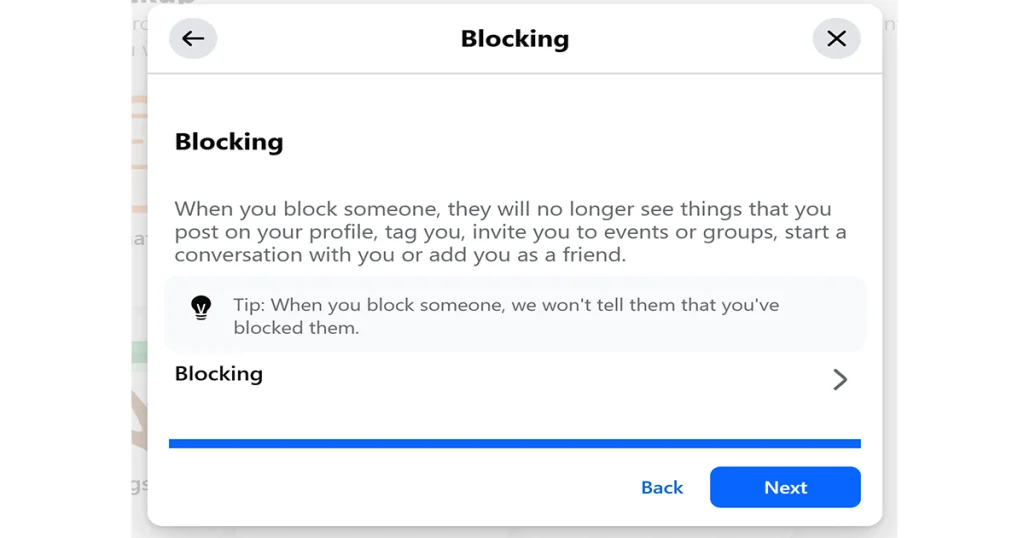
If you are satisfied with your settings, click Next to continue.
Step 8: Review your other privacy settings
At the end of the Privacy Checkup, Facebook may give you the option to Review another topic.
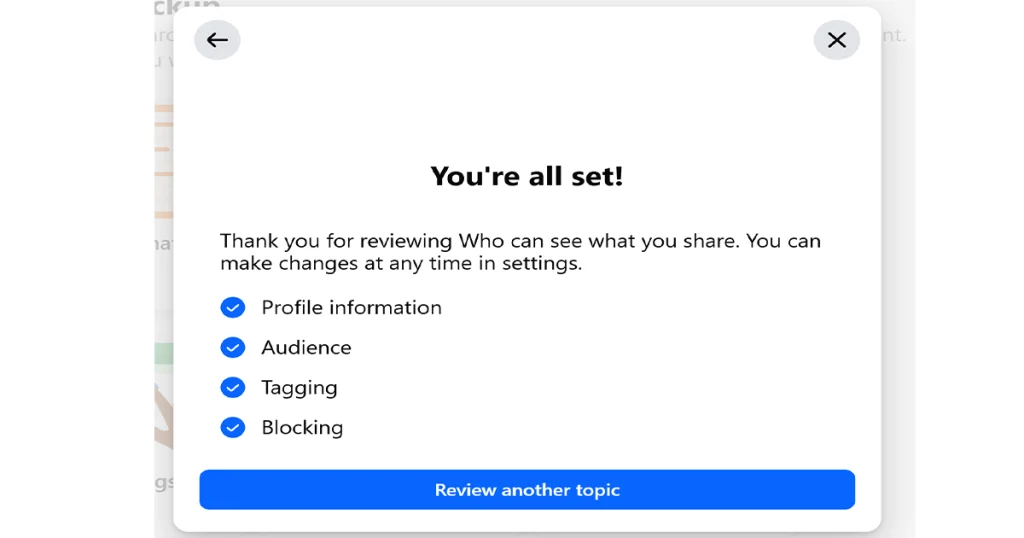
Click it if you want to check additional privacy settings.
Review your profile information, audience settings, posts, and other available privacy options to make sure they match the level of privacy you want.Is a Facebook Account Completely Private After These Steps?
Not necessarily.
This is an important point: Facebook does not have one setting that makes every part of your account completely invisible.
Some basic profile information, such as your name and profile picture, may still be visible to other people. Facebook also has separate controls for different types of information and interactions.
That’s why it’s better to think of this process as making your Facebook account more private rather than completely invisible.
Extra Facebook Privacy Settings You Should Check
After completing Privacy Checkup, it’s worth reviewing the broader privacy settings manually.
Check:
- Who can send you friend requests
- Who can look you up using your email address
- Who can look you up using your phone number
- Whether search engines can link to your profile
- Who can see your friends list
- Who can post on your profile
- Who can see posts you’re tagged in
- Who can follow you
The exact options available can vary depending on Facebook’s current interface and your account.
How to Check Your Facebook Profile From Another View
After changing your privacy settings, you can also use Facebook’s profile-viewing tools to understand what other people may see.
This is a useful final check because privacy settings can apply differently to posts, profile information, tags, and other parts of your account.
If you notice something that you don’t want visible, return to your privacy settings and change the relevant audience.
Final Check
After completing these eight steps, your Facebook account should be much more private than before. However, remember that making your account private does not mean every part of your Facebook profile becomes invisible.
It is a good idea to periodically open Privacy Checkup and review your settings again because Facebook can change its privacy options and menus over time.
In short: Open Facebook → Profile picture → Settings & privacy → Privacy Checkup → Who can see what you share? → review your settings → Limit Past Posts → check Blocking → review other privacy settings.
Facebook’s own help pages confirm that privacy-related controls can vary by feature and account, so the exact options you see may not be identical to another person’s account.


Add your first comment to this post