
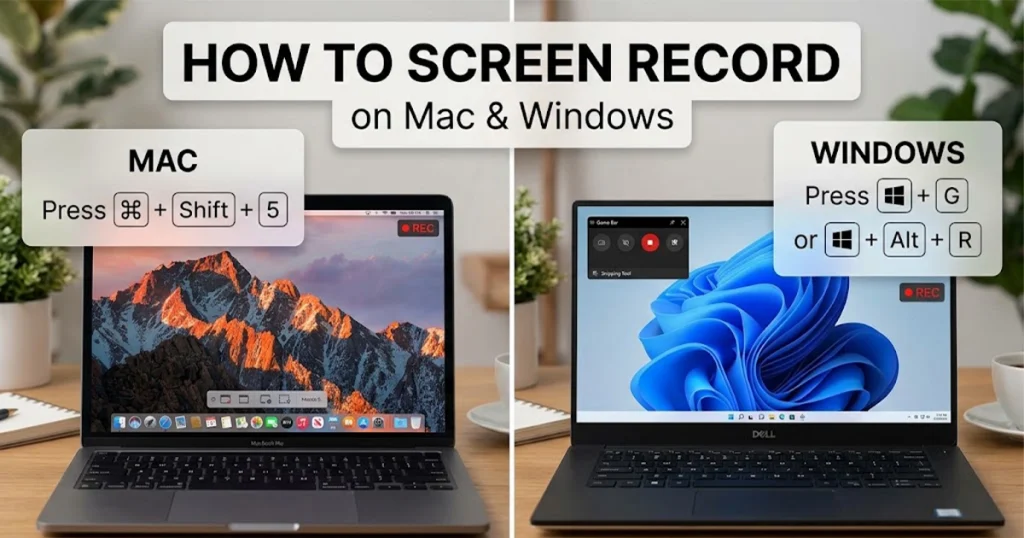
 How to Screen Record on Mac and Windows does not require expensive software or complicated setups. Whether you want to create a tutorial, record a software problem, save an important meeting, or show someone exactly what is happening on your computer, both Windows and macOS include built-in screen recording tools.
On Windows, you can use Xbox Game Bar or the Snipping Tool, depending on what you want to record. Windows 11 also has a dedicated video recording option inside Snipping Tool that lets you select a specific area of the screen before recording.
Mac users can use the built-in Screenshot toolbar or QuickTime Player. The Screenshot tool can record the entire screen or a selected portion, while current versions of macOS also provide options for recording a selected window.
This guide explains the easiest ways to screen record on Mac and Windows, including keyboard shortcuts, microphone settings, audio options, file locations, and useful third-party tools.
How to Screen Record on a Windows Laptop or PC
Windows offers several ways to record your screen. The best option depends on whether you want to capture an application, a game, a custom area, or the entire screen.
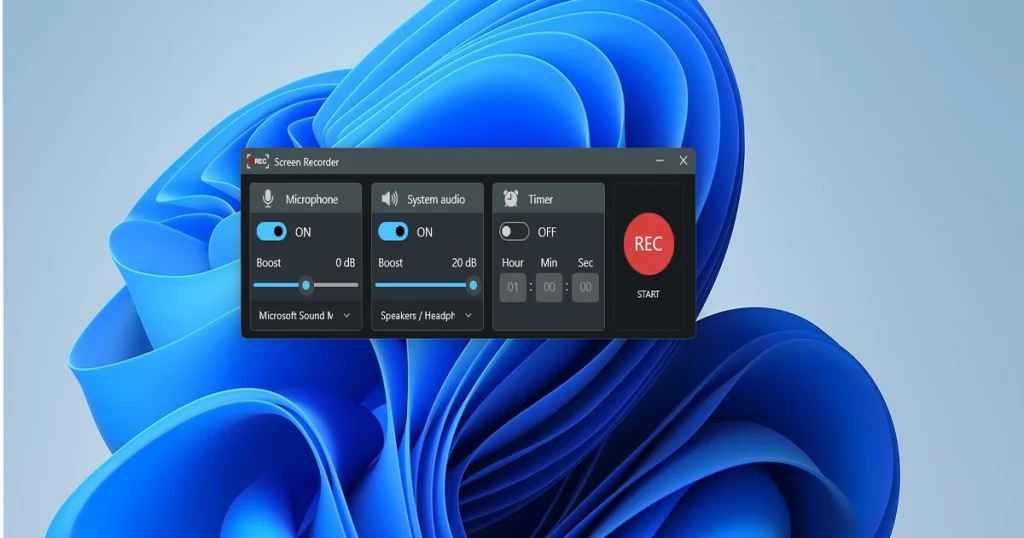
Method 1: Use Xbox Game Bar on Windows 10 and Windows 11
Xbox Game Bar is one of the fastest ways to start a recording without installing another program. Microsoft supports the Windows + Alt + R shortcut for starting and stopping a recording, while Windows + G opens the Game Bar interface.
Best for: Recording games, individual applications, and browser activity.
Steps to screen record with Xbox Game Bar
- Open the application, browser, or game you want to record.
- Press Windows + G to open Xbox Game Bar.
- Find the Capture widget.
- Click the Record button.
- Alternatively, press Windows + Alt + R to start recording immediately.
- Continue using the application normally.
- Press Windows + Alt + R again to stop the recording.
You can also press Windows + Alt + M to turn the microphone on or off while recording.
Important Xbox Game Bar limitation
Xbox Game Bar is designed primarily around recording an app or game rather than functioning as a general-purpose desktop recorder. If you need to select a specific rectangular area of the Windows desktop, Snipping Tool is the better built-in option on Windows 11.
Method 2: Use Snipping Tool on Windows 11
Windows 11 includes screen recording directly inside Snipping Tool. Microsoft says the video feature lets you select and refine part of the screen before starting the recording.
Best for: Recording a specific area of your screen, tutorials, demonstrations, and quick troubleshooting videos.
Steps to screen record with Snipping Tool
- Open Snipping Tool from the Start menu.
- Select the Record option.
- Click New.
- Select the rectangular area you want to record.
- Click Start.
- Perform the actions you want to capture.
- Click Stop when you are finished.
- Save the resulting video or open it in Clipchamp for further editing.
There is also a keyboard shortcut: Windows + Shift + R opens the Snipping Tool video recording overlay.
One advantage of Snipping Tool is that you do not have to record everything visible on your monitor. You can select only the portion of the screen that contains the content you want to show.
How to Screen Record on a Mac
Mac computers have a built-in screen recorder, so you normally do not need additional software for basic recordings.
The easiest method is the Screenshot toolbar, available through the Shift + Command + 5 keyboard shortcut. Apple says this feature is available on macOS Mojave 10.14 and later.
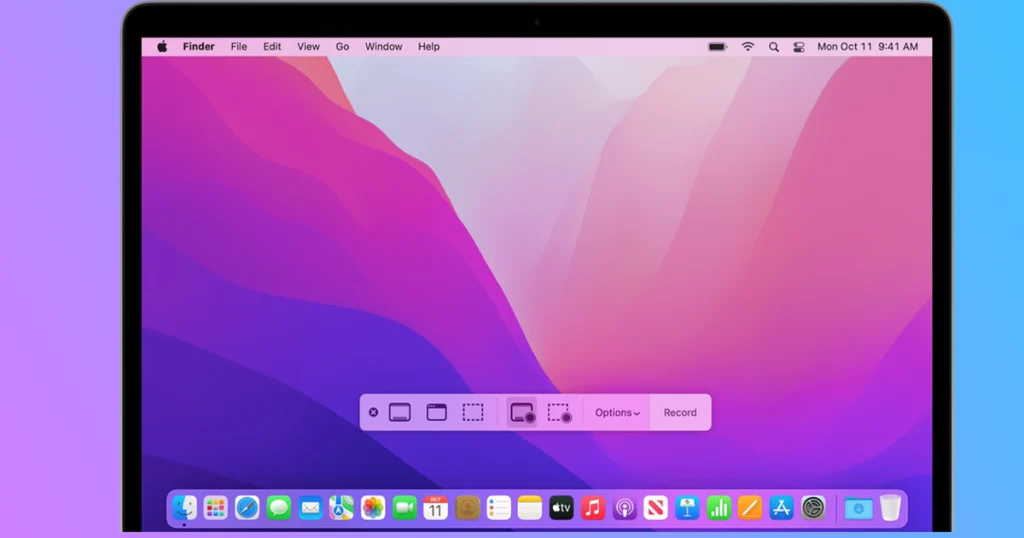
Method 1: Use the Screenshot Toolbar
Best for: Quickly recording the entire screen, a selected portion, or—in current macOS versions—a selected window.
Steps to screen record on Mac
- Press Shift + Command + 5.
- Look at the toolbar that appears at the bottom of the screen.
- Choose Record Entire Screen or Record Selected Portion.
- If your Mac supports it, you can also choose Record Selected Window.
- Click Options if you want to change the microphone, timer, pointer, or save location.
- Click Record.
- Perform the actions you want to capture.
- Click the Stop button in the menu bar when finished.
Apple says recordings are saved to the Desktop by default, although you can change the destination through the Options menu.
Record your voice while screen recording
If you want to explain what you are doing while recording, open Options before you start and select a microphone.
This is useful when creating tutorials, software demonstrations, troubleshooting videos, or online lessons. Apple also lets you choose whether the pointer and mouse clicks should be displayed.
Method 2: Use QuickTime Player
QuickTime Player remains another built-in option for Mac screen recording.
Best for: Older macOS versions, simple recordings, and users who prefer QuickTime’s interface.
Steps to record with QuickTime Player
- Open QuickTime Player.
- Select File from the menu bar.
- Choose New Screen Recording.
- Select your recording options.
- Choose a microphone if you want to record your voice.
- Click Record.
- Click anywhere to record the entire screen, or select an area to record only part of the display.
- Click the Stop button when finished.
On current macOS versions, QuickTime’s New Screen Recording command opens the Screenshot controls, so the underlying recording experience may look similar to the method above.
Mac screen recordings are saved as .mov files by default. Apple also notes that the automatically saved recording uses a name such as Screen Recording [date] at [time].mov.
How to Record Your Voice and Computer Audio
Screen recording is only half of the job. If you are creating a tutorial or demonstration, audio can be just as important as the video.
There are two different types of audio you may want:
- Microphone audio: Your voice or sound from an external microphone.
- System audio: Sound produced by applications, games, browsers, or the operating system.
These are not always handled the same way on Windows and Mac.
Windows audio recording
Windows gives you several options depending on the recording tool you use.
With Xbox Game Bar, you can toggle the microphone while recording using Windows + Alt + M.
For more advanced recording, tools such as Clipchamp and OBS Studio provide additional audio controls. Microsoft also provides microphone settings through Settings > System > Sound, where you can select and test your input device.
If you use Clipchamp, its screen recorder can capture microphone audio, while supported recording workflows can also include system audio.
Mac audio recording
Mac’s Screenshot tool allows you to select a microphone before recording. This makes recording your own narration straightforward.
However, recording application/system audio is a different issue. If you need advanced system-audio routing, you may need a third-party solution.
One popular free option is BlackHole, a virtual audio loopback driver for macOS that routes audio between applications.
For example, you can use BlackHole when you need to route Mac audio into another recording application. This is more advanced than a normal screen recording, so most users who only need to record their voice will not need it.
Mac vs. Windows Screen Recording: Quick Comparison
| Feature | Windows | Mac |
|---|---|---|
| Built-in recorder | Xbox Game Bar / Snipping Tool | Screenshot |
| Quick shortcut | Win + Alt + R |
Shift + Command + 5 |
| Custom recording area | Yes with Snipping Tool | Yes |
| Full-screen recording | Yes, depending on tool | Yes |
| Microphone | Supported | Supported |
| System audio | Depends on tool | More limited in basic built-in workflow |
| Default common format | MP4 with many Windows tools | MOV |
| Extra software required | No for basic recording | No for basic recording |
| Advanced recording | OBS, Clipchamp, others | OBS, QuickTime, others |
The exact recording format and audio capabilities can vary by tool and operating-system version, so it is better not to assume that every Windows recorder produces the same file type.
When Should You Use Third-Party Screen Recording Software?
Built-in tools are enough for most quick recordings. However, dedicated software becomes useful when you need more control.
OBS Studio
OBS Studio is a strong choice for users who want advanced recording or streaming features. It can combine multiple sources, including displays, windows, images, browser windows, text, webcams, and other inputs.
It is particularly useful for:
- YouTube tutorials
- Gaming videos
- Live streaming
- Multiple monitors
- Webcam + screen recording
- Advanced audio setups
- Multiple scenes and sources
OBS also provides Display Capture for recording an entire monitor and Window Capture for recording a particular application window.
The downside is that OBS has a bigger learning curve than Windows Snipping Tool or the Mac Screenshot toolbar.
Loom
Loom is another option when the main goal is quickly recording a screen and sharing the result with other people. It can be useful for work messages, demonstrations, feedback, and short explanatory videos.
For simple personal screen recording, however, you may not need a third-party service at all.
Common Screen Recording Problems and Fixes
Why is my screen recording black?
Some applications protect their content from screen capture. Streaming and protected-content applications can prevent their windows from being recorded normally.
Apple specifically notes that some apps, including Apple TV, may not allow their windows to be recorded.
If a recording is black, first test the recorder with a normal desktop window. If other applications record correctly, the problem may be related to the application’s content-protection system rather than your screen recorder.
Where did my recording go on Mac?
By default, the Mac Screenshot tool saves recordings to the Desktop. You can change this through Options > Save To before starting the recording.
Where did my Windows recording go?
The location depends on the tool you used.
For Xbox Game Bar recordings, check the Captures folder under your Windows user’s Videos folder.
For Snipping Tool recordings, the recording can be saved from the Snipping Tool interface after you stop recording.
Why isn’t my microphone working?
Check that Windows or macOS has permission to access your microphone.
On Windows, go to Settings > System > Sound and make sure the correct microphone is selected and working.
On Mac, check System Settings > Privacy & Security and review the relevant microphone and screen/audio recording permissions. Apple provides separate controls for apps that can access screen and system audio recording.
Why can’t another app record my Mac screen?
macOS includes privacy controls for screen and system-audio recording. If an application does not have permission, open:
Apple menu → System Settings → Privacy & Security → Screen & System Audio Recording
Then allow the application that needs access.
Which Screen Recording Method Should You Use?
If you are on Windows 10 or Windows 11 and want the fastest way to record an application or game, Xbox Game Bar is a convenient choice.
If you are using Windows 11 and want to select a specific part of the screen, Snipping Tool is usually the simpler option.
On a Mac, press Shift + Command + 5 for the quickest built-in recording experience.
For advanced projects involving multiple screens, webcams, separate audio sources, overlays, or streaming, OBS Studio is a better choice.
Final Thoughts
Learning how to screen record on Mac and Windows is much easier than it used to be. You do not need expensive software just to capture a tutorial, demonstrate a problem, record a quick explanation, or save something happening on your screen.
On Windows, Windows + Alt + R is one of the quickest shortcuts for Xbox Game Bar, while Windows 11 users can use Windows + Shift + R with Snipping Tool for a selected area. On Mac, Shift + Command + 5 opens the built-in Screenshot controls almost instantly.
For more advanced projects, OBS Studio gives you significantly more control. But for everyday screen recording, the tools already included with your computer are usually enough.
If you have trouble recording your screen, microphone, or system audio, check the relevant permissions and recording settings first. In many cases, the solution is already built into Windows or macOS—you just need to enable the right option.

Add your first comment to this post